Website owners often use Cloudflare to improve the performance of their websites. When you use Cloudflare on your website, the delivery of your website pages will be automatically optimized, and users will experience a fast load time.
You can follow a few easy steps if you want to create an account on Cloudflare and add your website. Let's check the steps;
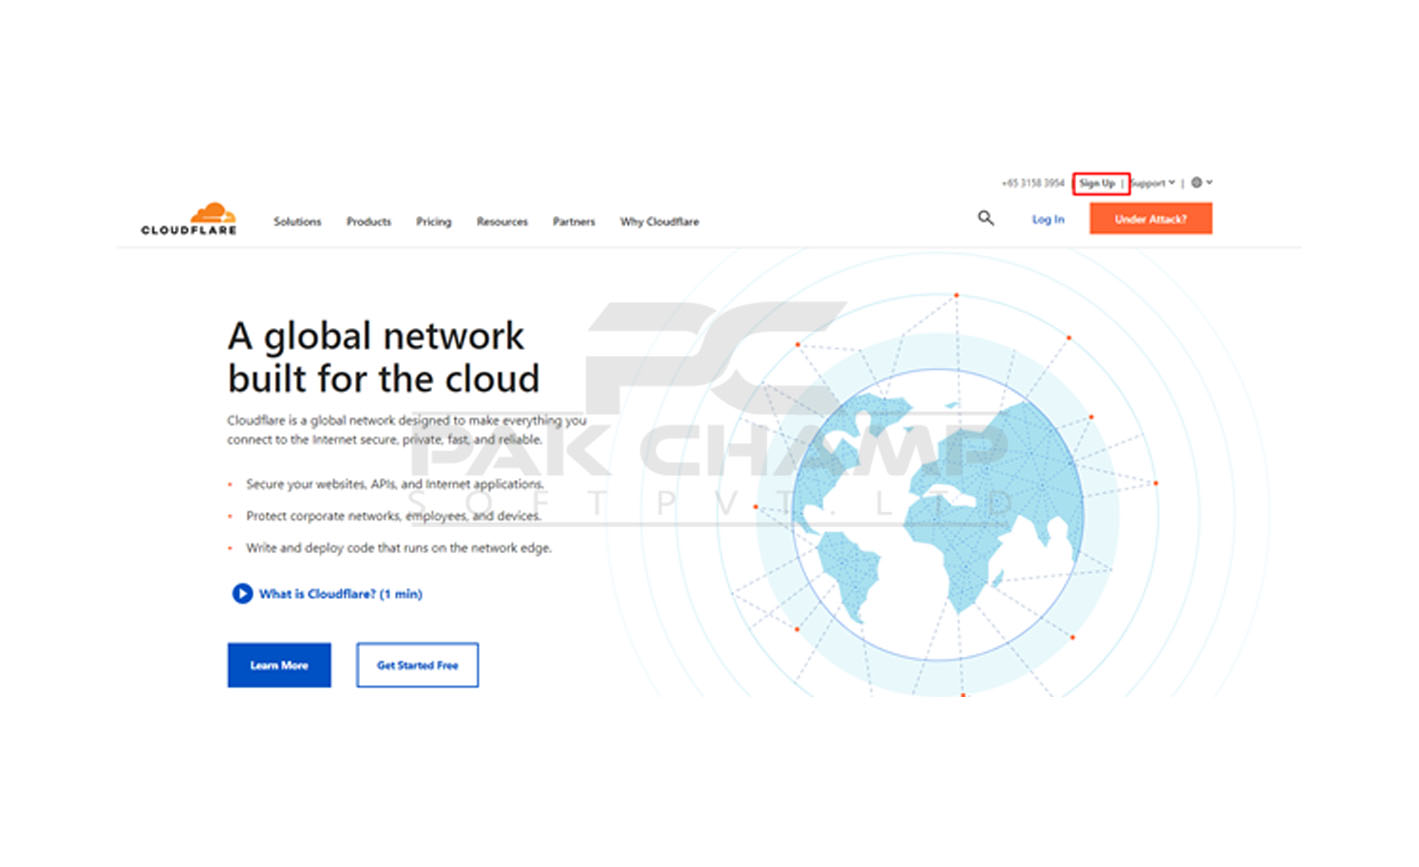
Step 1: Go to Cloudflare's Website and Click on the 'Sign Up Button
To create an account on Cloudflare, go to www.cloudflare.com and click on the 'Sign Up' button in the top right corner.
Step 2: Create an Account on Cloudflare
Enter your credentials and create an account on Cloudflare to add your website.
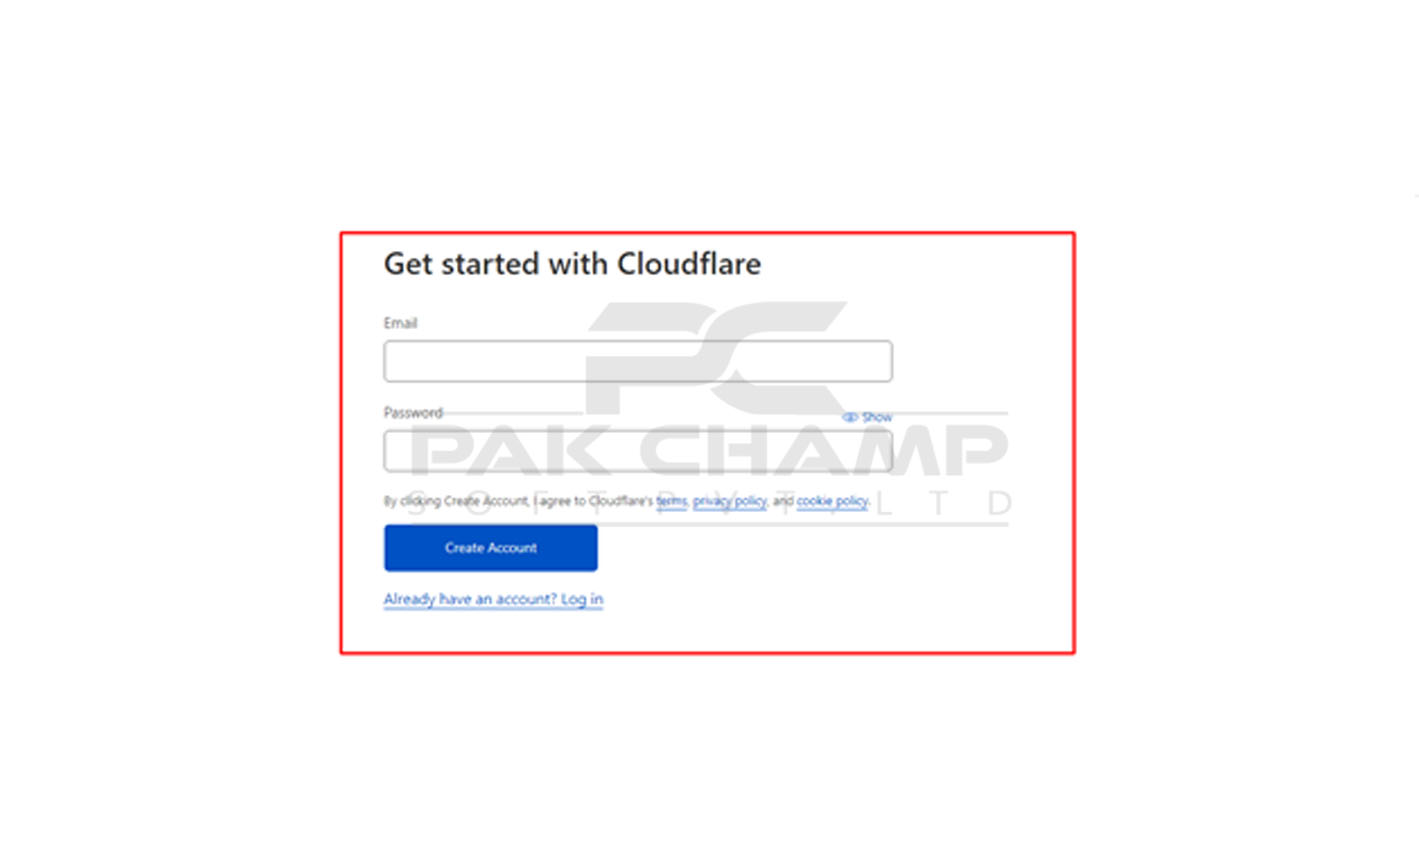
You'd also need to verify your email address through the link that you receive in your email.
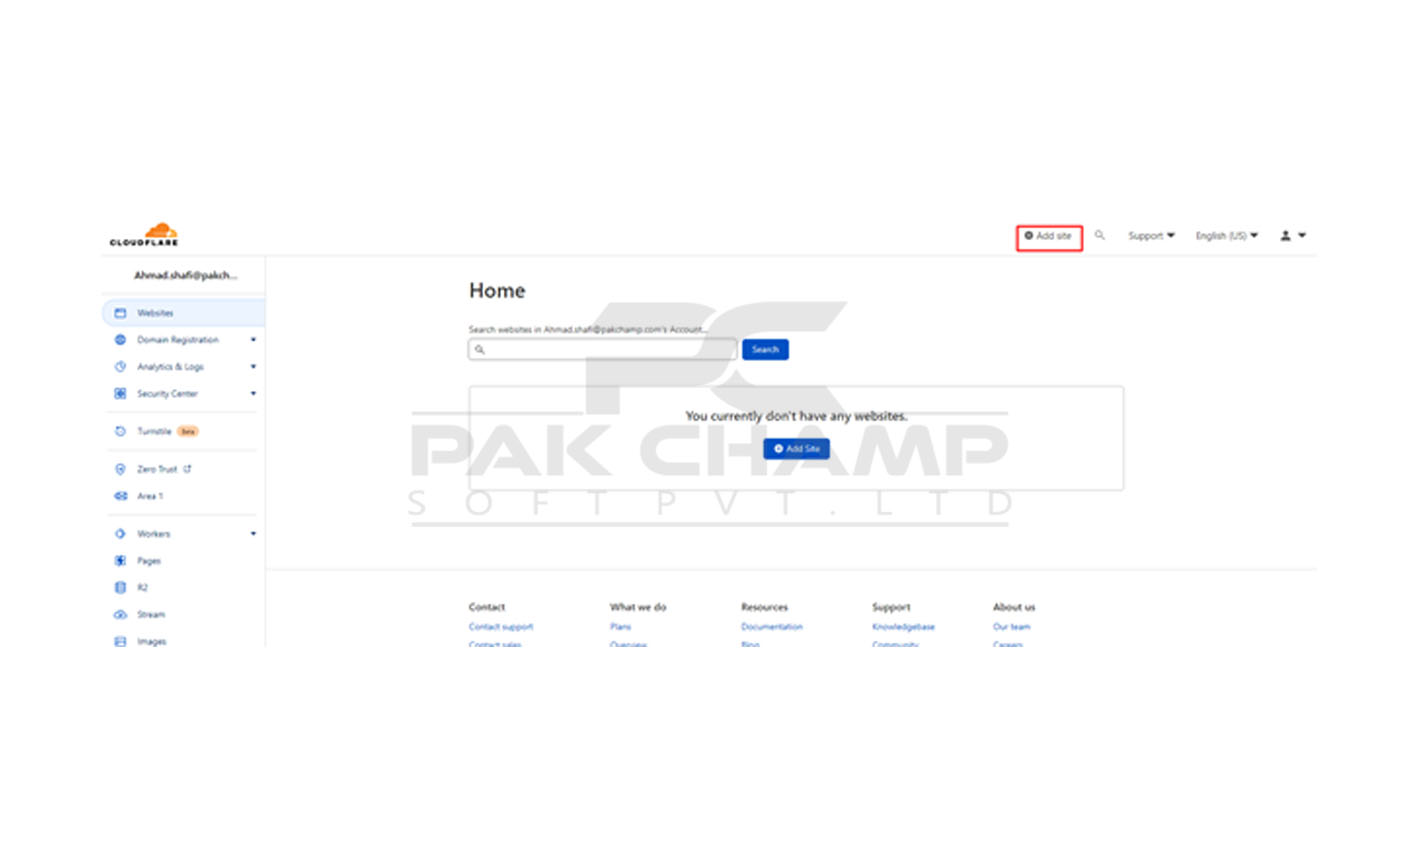
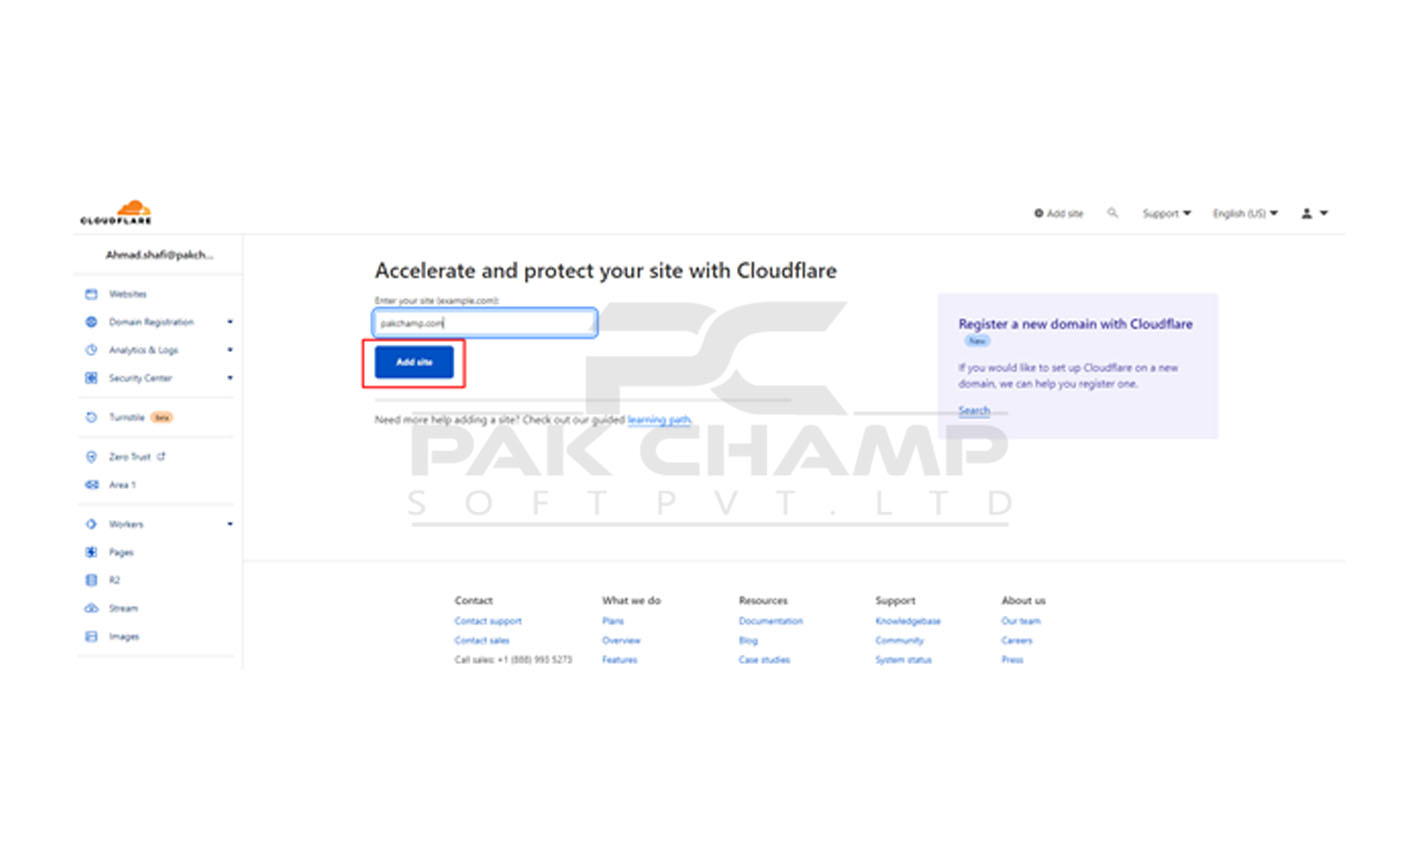
Step 3: Click on "Add Site"
Once your account has been created, go to the "Websites" option on the left menu. Here, click on the "Add Site" button.
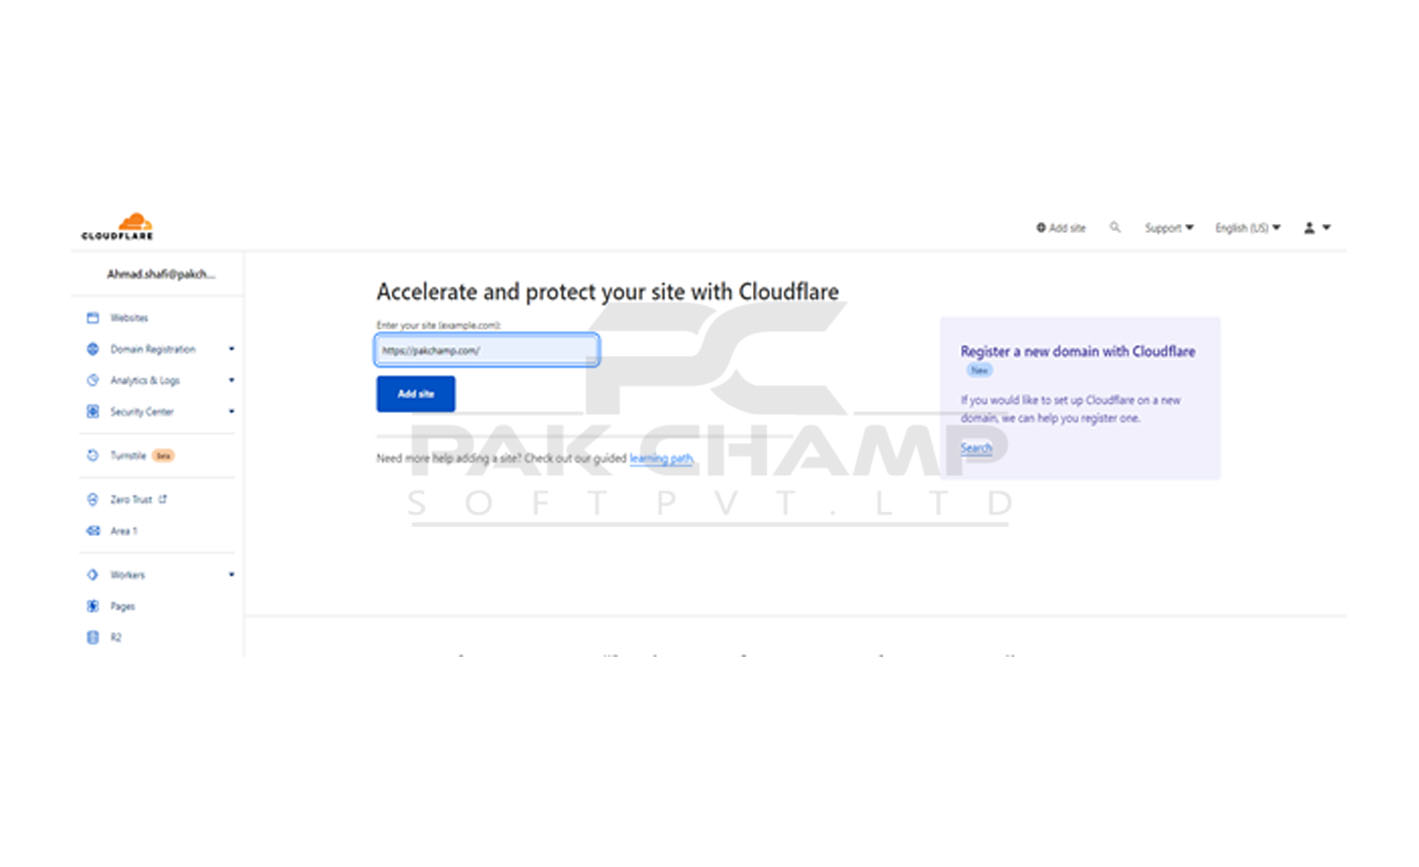
Step 4: Enter Your Domain Name and Click on "Add Site"
Now, in the given bar, enter your domain name. It is not compulsory to add 'www' before your domain name. For instance, if your website URL is "www.abc.com," you can add "abc.com."
If you are confused about this, steps Pakchamp's efficient hosting staff 24/7 available to do on your behalf.
Once you've added your URL, click on the "Add Site" button.
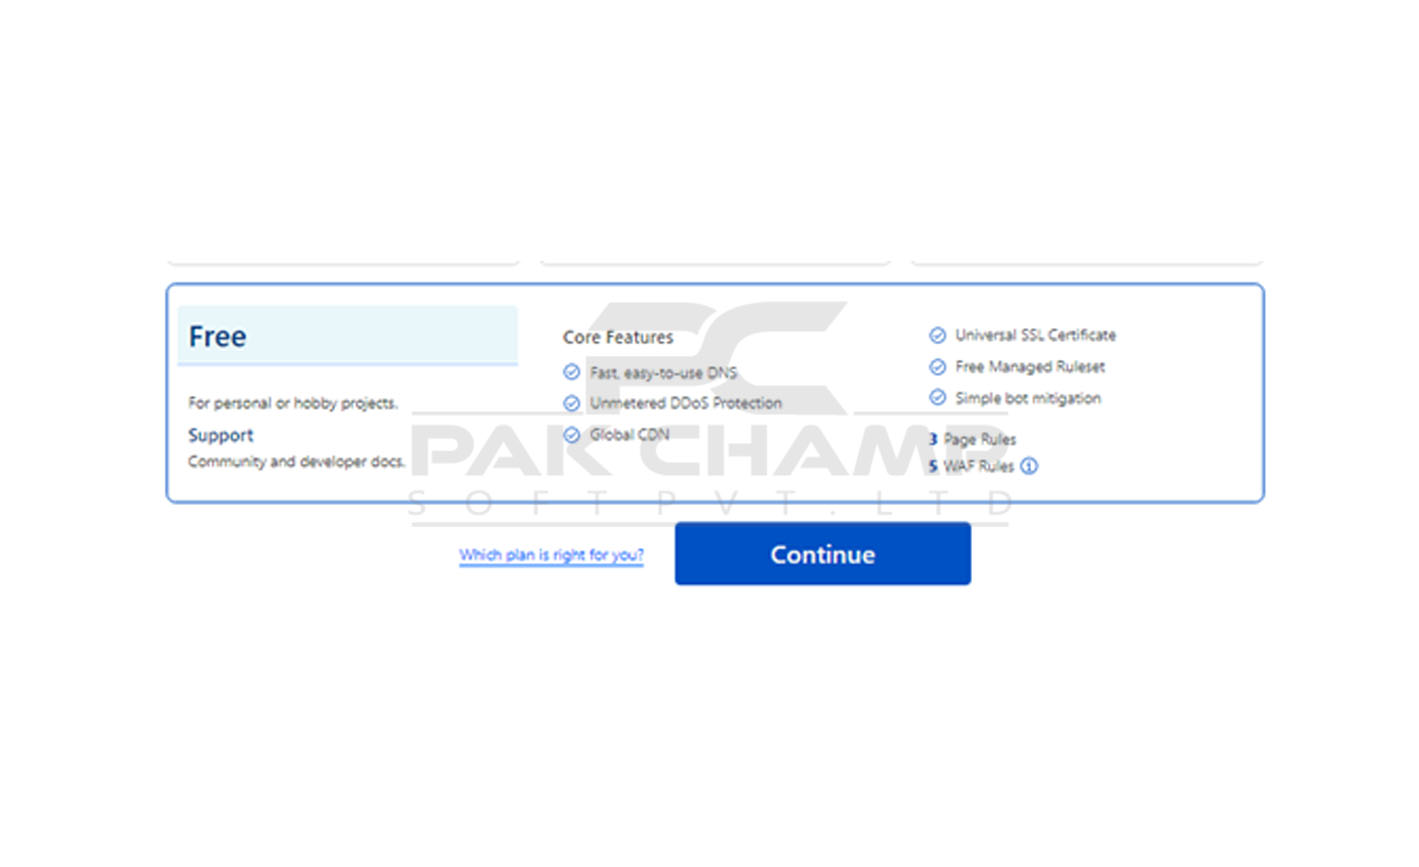
Step 5: Select the "Free" Plan and Click on "Continue
If you don't want to buy a plan from Cloudflare, you can select their free plan and click on the "Continue" button.
Step 6: Click on "Continue" After the DNS Records Scan is Complete
Cloudflare would now conduct DNS records scan. After completing this scan, click on the "Continue" button.
You will also be provided with a list of all the DNS records, and you can select which one you want to enable on Cloudflare before clicking on "Continue."
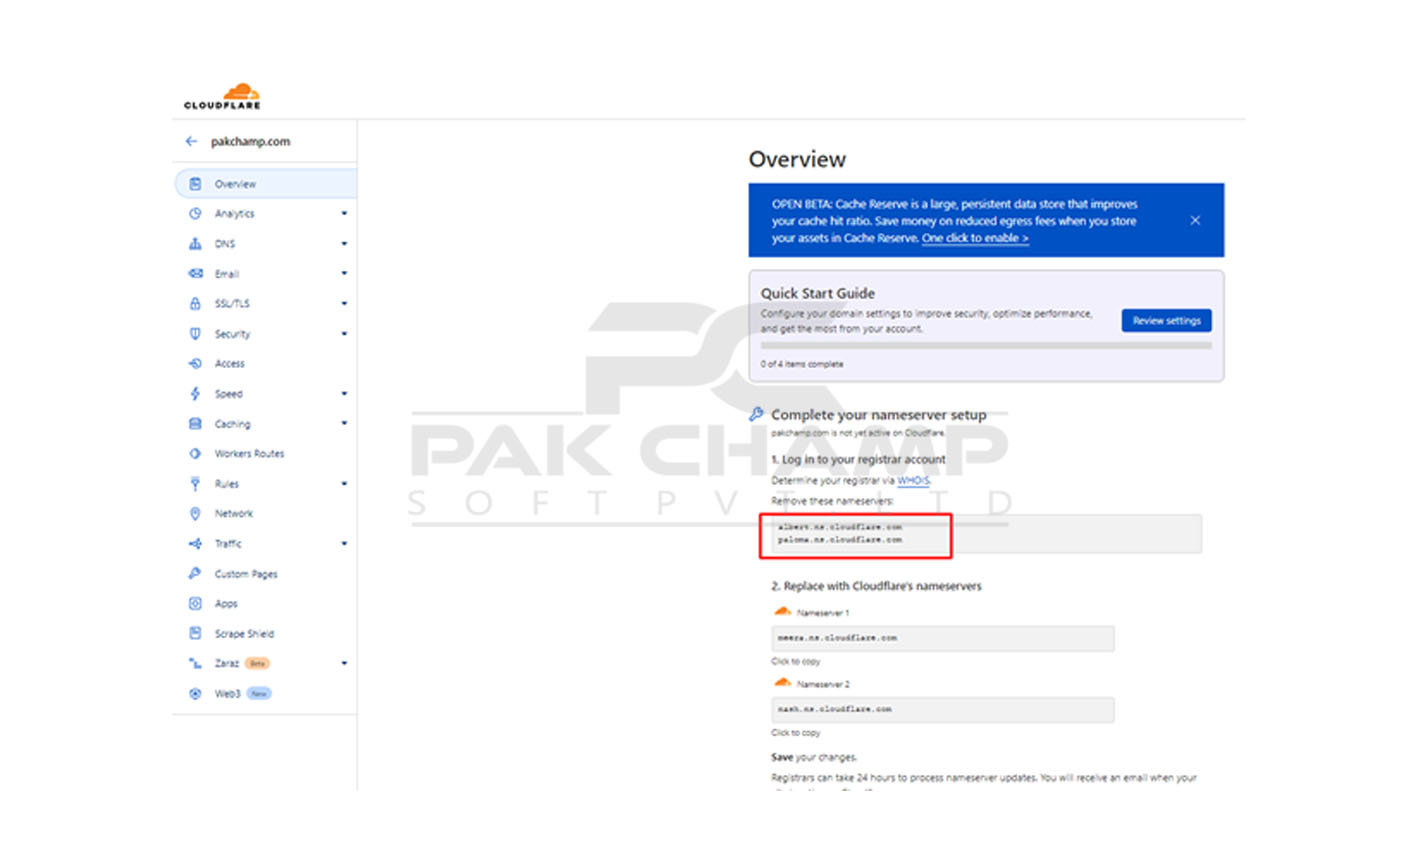
Step 7: Add Cloudflare Nameservers for Your Domain
Now, you can remove previous nameservers to your domain and add Cloudflare nameservers. After doing so, click on the "Done, check nameservers" button.
That's all; your website will now be added to your Cloudflare account!
If you have any queries, contact our support executives through the live chat option available on our website: https://pakchamp.com/.
